

Waterproof Connector Factory: A Look Inside Precision Sealing and Assembly
2026-11-16
Most people never think about the silicone collar inside a waterproof connector until a machine floods at 3 a.m. At REUNION, that invisible ring is the whole story. This walkthrough shows how precision sealing and assembly turn a small metal shell into the reason your equipment keeps running when it shouldn’t. If you have ever wondered what actually stands between a clean signal and a short circuit, REUNION is about to make it visible.
Leak Prevention Starts Before the First Mold Is Machined
Most leaks blamed on O-rings or poorly cut seal grooves actually have their start in the CAD model. Once the cooling circuit layout, tap locations, and seal counterbores are locked in, the available wall stock and alignment conditions are already determined. A toolroom can chase a weep around a baffle or pipe plug for days, but if the waterline was placed too close to a standing boss or the thread engagement was designed into a thin rib, no amount of hand fitting will make the joint permanently stable.
Before any electrode is burned or the first drill cycle runs, it is worth walking the cooling model with leak paths in mind. Check where deep gun-drilled holes cross each other, how much steel remains behind a pipe-thread port, and whether the bottom corner of a seal groove will actually clean up at the specified diameter. Small details like adding a flat-bottom allowance for an O-ring boss or moving a connector pad away from an ejector pinhole can remove the need for sealant, tapered thread tape, or emergency welding after the mold is already in the press.
Machining sequence plays a quieter but equally important role. Drilling waterlines before finish-cutting the parting line or seal faces lets the part settle and reduces the chance of a freshly cut surface shifting when deep holes are roughed later. Shops that leave seal counterbores and plug faces for the final semi-finish pass tend to see far fewer nuisance seeps during first trials, not because they use better O-rings, but because the metal around those seals was never disturbed after it mattered.
Where Microns Decide Whether a Seal Holds
A lip seal that looks flawless under shop lighting can still leak at pressure. The difference is often hidden in surface finish. Once shaft roughness climbs past a certain Ra, the elastomer cannot follow the valleys, and a spiral of micro-channels opens between the lip and the metal. Those channels are tiny, but hydraulic fluid finds them long before the human eye does.
On the opposite end, a surface polished too smooth creates its own failure. Without shallow peaks to retain a boundary film, the lip runs dry, heats up, and begins to crack. The margin between too rough and too smooth is frequently no wider than a few microns. That is why successful sealing depends less on tightening hardware and more on controlling what happens at the surface interface.
Bore and shaft tolerances stack up in ways that drawings rarely capture. A few microns of eccentricity, a faint lead from grinding, or a chamfer cut slightly too deep can turn a designed contact band into a leak path. When seal manufacturers speak of a working window, they are describing this narrow space between embedment, wear, and film thickness, where a component holds not because it is clamped harder, but because the surface and the seal agree at the micron level.
Material Pairings That Keep Water on the Outside
A tightly woven nylon or polyester face fabric does not do much on its own once rain finds the seams, but pairing it with an expanded polytetrafluoroethylene or polyurethane membrane changes the story. The outer layer takes the abrasion and holds the durable water repellent, while the membrane sits underneath and blocks liquid water without turning the inside into a sauna. The trick is to keep those two materials close enough that water never pools between them, so a hanging mesh liner or a printed backer often gets added to give the membrane something to rest against.
On the liner side, polyester knits and mesh panels are chosen less for their hand feel and more for how they manage moisture next to the skin. They pull sweat off the membrane so condensation does not read as a leak. In cuffs, hems, and neck openings, polyurethane-coated tapes or thin films replace bulky stitching and eliminate needle holes that would otherwise invite water inward. This layered approach, soft inside and sealed outside, is usually what makes the difference between a jacket that misty weather can defeat and one that still feels dry after hours of steady rain.
Hardware disrupts waterproofing faster than fabric, so zippers and pulls get paired with polyurethane or silicone coatings, and storm flaps are backed with low-profile hook-and-loop or magnet closures instead of exposed metal. When every seam, pocket, and adjustment point uses materials that either shed water or sit behind a weather seal, the whole garment starts to behave like a shell rather than a collection of parts.
Assembly Steps Built Around Repeatable Sealing
Most assembly sequences treat sealing as an afterthought, but here the closure logic shapes the order of operations from the start. Each component is positioned so the resealable lip lands on the same reference edge, which removes the usual guesswork about alignment and pressure.
The sequence repeats in short, deliberate passes: seat the film, press along the track, open the seal once to check for lift, then close and run a thumb across the full length. That single test-open step catches most failures before the unit moves further down the line.
Because the motion stays identical across units, operators develop a rhythm instead of relying on written reminders. The result is a process where repeatable sealing becomes the natural checkpoint rather than a separate quality gate.
Pressure, Immersion, and Thermal Shock Testing
Products rarely fail under steady conditions; it's sudden environmental shifts that expose weak seals, joints, and material boundaries. Pressure, immersion, and thermal shock testing are run as a combined sequence rather than isolated checks, because field failures often happen when these stresses overlap. A housing that survives static submersion may still leak after rapid cooling contracts the gasket at a different rate than the metal body.
Pressure testing cycles internal or external loads to find the point where seals start to weep or enclosures deform. Immersion testing then puts the same unit underwater, often with a shallow depth or pressurized column, to catch leakage paths that only open after mechanical strain. Thermal shock moves the sample between hot and cold baths, sometimes in a matter of seconds, forcing materials with different expansion coefficients to pull against each other. The test sequence is deliberately harsh: each stress leaves behind subtle damage that the next stress amplifies.
What gets recorded is rarely just pass/fail. Technicians log when leakage begins, how many cycles it takes for cracks to appear, and whether condensation inside the enclosure clears or lingers. That detail matters for warranty decisions and for setting realistic operating limits. A product that survives a few cycles in a lab isn't necessarily proven for years of outdoor use, but the failure pattern shown across pressure, immersion, and thermal shock gives a far better read than any single test alone.
The Final Look That Catches What Machines Miss
Automated checks are fast, but they can be strangely literal. A slight shadow, an unusual reflection, or a material that bends light just enough to confuse a sensor will slip right through. That last human pass is not about redoing the entire inspection; it is about knowing where the system tends to blink and paying extra attention to those edges, seams, and surfaces.
Experienced reviewers develop a feel for the almost-wrong. It might be a texture that looks acceptable in data but feels off under fingertips, or a label that scans correctly yet sits a millimeter out of place. These are not failures a checklist can easily name. The final look gives those quiet instincts a chance to catch what the algorithm never learned to see.
What makes this step different is its judgment, not just its eyes. Machines flag deviations; people weigh whether a deviation actually matters for the person who will open the box, mount the part, or wear the garment. That small pause before release often separates a product that merely passes from one that actually feels right.
FAQ
It is rarely the outer shell doing the work. A compressed O-ring or gasket in a machined groove creates the main barrier, and the cable jacket forms a secondary seal where the wire enters the housing. The groove depth and surface finish are more important than rubber thickness; too much crush can split the seal, while too little leaves a slow path for moisture.
Seals sit in partially enclosed grooves instead of flat faces, and the mating parts usually have a small lead-in chamfer so the ring slides into place rather than rolling. Press force is monitored closely, and a pinched ring tends to show up as a sharp force spike. Some stations add a quick camera check before the housing is locked.
A gasket works when the joint is serviceable and the wire arrangement is controlled. Potting makes sense for permanent assemblies with many conductors, odd entry angles, or heavy vibration, because the compound fills irregular voids that a molded seal cannot always follow. The downside is that rework turns destructive and bubbles must be avoided during curing.
Pressure decay or vacuum decay chambers are much better at catching micro-leaks. The part is pressurized or evacuated, then the tester watches for a small pressure shift over a few seconds. Because temperature swings can masquerade as a leak, stable room conditions or compensation are part of the pass/fail decision.
A seal that feels fine at room temperature may harden in freezing conditions and stop following the housing movement. Silicone keeps its flexibility at low temperature but is not the best with certain oils, while EPDM resists weather well but can stiffen. Matching the seal compound to both the cable jacket and the expected temperature range avoids most early field failures.
Compression set, UV exposure, and repeated hot-cold cycles can slowly relax the preload on the rubber. A well-built connector keeps extra compression allowance in the seal design and uses elastomers that resist weathering. Validation often includes thermal shock or salt-fog testing on assembled parts, not just on raw material samples.
For potted or ultrasonically welded designs, it generally gets scrapped because opening the unit destroys the seal. For serviceable designs, the failed part moves to a rework bench where the sealing surfaces are inspected under magnification and the O-ring is replaced if there is any nick or debris. It then has to pass the same leak test again before it leaves the line.
Conclusion
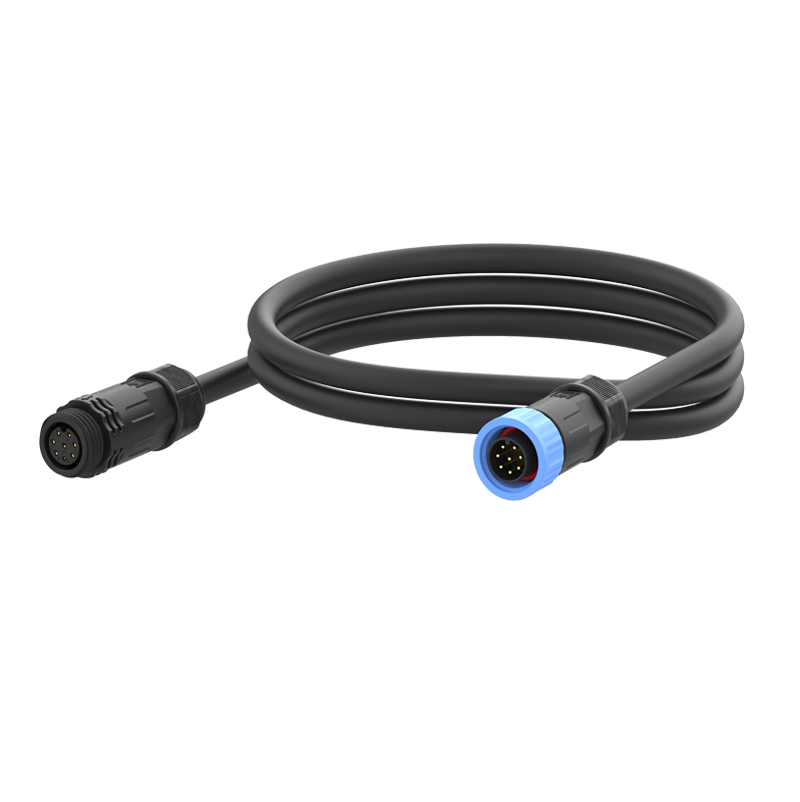
Waterproof connector production rarely begins on the assembly floor. In most lines, the real decisions are made at the design review table, where cavity pressures, draft angles, and parting line locations get argued before any steel is cut. A poorly placed knit line or an overly aggressive taper can create a path for moisture long before the first shot is molded. Once tooling starts, tolerances tighten to the micron range because a seal groove that drifts even slightly changes compression on the O-ring. That compression, paired with carefully selected housing resins and elastomers, is what keeps water where it belongs. Silicone, nitrile, and fluorocarbon seals each behave differently under temperature swings, so pairing them with the right plastic or metal shell is not a catalog choice; it is a calculation of durometer, thermal expansion, and chemical exposure.
On the line, assembly builds around one idea: repeatable sealing. Operators follow sequenced torque patterns, controlled insertion depths, and verified lubricant coverage, because a rushed snap-fit or a dry seal can pass a quick visual check and still leak under pressure. Every batch then moves through immersion tanks, pressure chambers, and thermal shock cycles that push housings past their rated limits. The final inspection is where trained eyes scan for micro-flash, uneven bead seating, and subtle surface defects that automated cameras often miss. Together, these stages turn a molded shell and a rubber ring into a connector that holds its seal after years of vibration, moisture, and temperature fatigue.
Contact Us
Contact Person: Hayley Liang
Email: [email protected]
Tel/WhatsApp: +86 13480625451
Website: https://www.reunion-china.com/